Baseball Throwing Program
A Baseball Throwing Program should begin at Tee-Ball level. Why? Because throwing a baseball is the first skill a player learns, but it's also where the trouble starts. Would you be surprised to know what causes most game-time errors is not poor fielding, but rather poor throwing.
It may seem quite odd that a team’s defense would be better at fielding the ball than throwing it, but this is probably because throwing is considered such a fundamental skill that most coaches take it for granted, placing a greater emphasis on fielding and hitting. Unfortunately, no one seems to pay attention to throwing until a game is lost due to a throwing error, then it’s Katy bar the doors on throwing drills.
Baseball Throwing Program - Never Too Early
Instead of waiting for a loss, let’s be pro-active and look at some methods to reduce throwing errors.
Accountability is a teachable mindset and is extremely important to incorporate into all drills. Players need to feel a sense of accountability whenever they make a bad throw in practice, that every bad throw has consequences.
If the shortstop overthrows the first baseman, make sure everyone realizes that runner is now on second base. As the adage says “You play like you practice,” and for this to happen, players must make game-like throws in every situation in practice. Putting infielders on the clock during practice drills adds a sense of urgency, while demanding 100% in every situation dramatically increases players' focus on their throws.
Consistency breeds accuracy, and the best way to promote consistency is to schedule repetitive throwing drills at every practice, as the coach must commit to implementing them as often as they do hitting and fielding drills.
Baseball Throwing Program - Long Toss
Here are some ideas…. Wait a minute we forgot something.
Before you begin any throwing drill the players must stretch and warm up their arms. The long toss is the best warm up method in baseball, as it warms, stretches and strengthens the arm all at the same time.
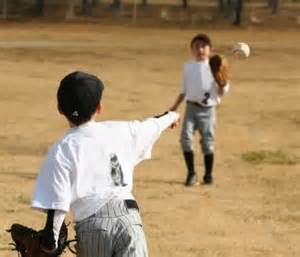
Simply: Players start at a normal throwing distance with another teammate.
After every five throws, players back up a set distance, say 5 feet, and still continue to keep their throws on a line.
After 5 throws the players back up 15 feet and so on and so on until reaching maximum distance.
Then repeat the progress in reverse order moving in every 5 throws until reaching conclusion.
Clickbank Products
Throwing Drills:
Always start at the most basic level regardless of how experienced your players may think they are, as they may learn they’re not doing everything properly, and if they are you glide through the basics quickly.
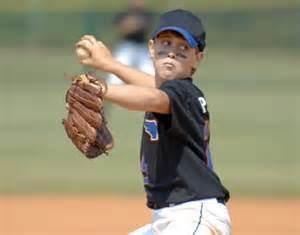
1. Players start in a throwing position with their lead shoulder, hip and foot pointed toward the target, holding the baseball with both hands as if they just fielded a ground ball.
2. On the coach's order, players will break their hands (separate them) and go into their throwing position, holding in that position for one or two seconds for self-evaluation, ensuring they're in the proper throwing position.
3. On the coach's command, players finish the throw to their partner and try to hit the target, the glove, which is being held outward, making sure to fully finish their throw.
Baseball Throwing Program - Throw to Target
Satisfied the players are performing their mechanics correctly, continue the drill, except delete the pause for self-evaluation and replace it with a sense of urgency to make the throw quickly.
Quick Release drills is the next logical step as this sort of brings together all the elements of the basic throwing mechanic
1. Divide the team into, having them face each other @ 20 feet apart. (the distance is at the coach’s discretion)
2. The players must field and throw the ball, as if they fielded a high hopper, as quickly and as accurately as possible.
3. The player must make the glove to hand transfer and while stepping forward hit the target his counter-part is holding up for him.
Performed properly and with the urgency and seriousness required, this is an excellent foot, hand, body and eye coordinating tool.
Baseball Throwing Program - Opening Up
Brand New Coaches -
Baseball Throwing Program
Even as experienced teachers we sometimes fail to practice what we preach, as I always preach repetitive actions become engrained, but sometimes move on to the next step too quickly. So I’m going to throw a slightly different wrinkle in the Basic Throwing Steps for new coaches to view and implement.
It should go without saying, any pause and check steps, should be eliminated once the step is learned. The most obvious, and probably important correction to look for in your player(s) is in shoulder angle - they should be in line with each other and the target, not cocked.
Start balanced
1. Get your feet under you, which mainly means regain your balance - very important after fielding the ball.
2. Line yourself up with your target. Some coaches tell the player to imagine Two invisible ropes, one tied from back foot through front foot, and from back shoulder to front shoulder, which are aimed directly at the target.
3. Locate the target quickly with both eyes, that way your head is facing the target, which helps insure you’re properly lined up.
Baseball Throwing Program - Crow Hop

4. Pushing off from the ground, on the inside balls of your plant foot, shoulder width apart. (From outfield, do a crow hop where back foot crosses in front of the front foot, then the front foot re-crosses moving forward building forward momentum towards the target.
Check and correct any mistakes.
Load Step:
1. Remove the ball from glove with ball resting on palm of throwing hand gripped firmly.
2. Bring both arms up, elbows raised to shoulder height. Resembling a scarecrow’s stance.
3. The throwing arm will swing out and up easily, allowing the fingers to get on top of the ball.
4. The throwing arm shouldn’t bend more than a right angle (90) and wider is probably better (120).
5. Glove arm up and opposite the throwing arm, with either glove or elbow to pointed towards target.
Front foot comes up ready to throw.
Stop, Check and correct.
Rotating the Body:
1. As you go to throw your Back foot rolls in and up to toes, back knee tucks forward.
This opens hips, to let torso come around, which brings throwing arm forward.
2. The Front leg will move forward for balance, keep it pointed slightly to the throwing arm side, knee relaxed.
3. Plant the front foot out front but don't worry too much about stride length. (Fielders might stride half their body length, pitchers 3/4 of body length or a bit more.)
4. Throwing elbow should still be shoulder high.
Check and correct.
5. When releasing the ball keep the glove in front of the chest, as the Glove will flip and pinch as the throwing arm comes forward. Some coaches teach to tuck the glove, but that increases the risk of pulling the body open too soon, in case the subject is brought up.
6. The Weight shifts forward over the bent landing knee, which is not severely bent, just enough to relax enough so the hips are free to let the upper body rotate through.
7. Arm comes forward, elbow extends, wrist delivers back spin.
Throwing arm sweeps across body to opposite hip, using contact with the body to stop safely.
Glove side still up out of the way as the throwing arm goes under.
Check and correct.
This second method is actually no different than the first … only explained differently. Whichever explanation you understand the best is the one to go with.
Baseball Throwing Program to Baseball Throwing Drills
Baseball Throwing Program to Coaching Baseball

New! Comments
Have your say about what you just read! Leave me a comment in the box below.