Baseball Coaching - Elementary Sliding
Baseball Coaching duties actually begin before Spring Training, but thought must be given to which practice elements would be well suited for, shall we say, less than ideal weather conditions, or inside drills.
Despite, what seems to be a popular belief, kids do not automatically know how to slide just because they’re kids, they must be taught the skills of proper sliding or risk injuries. Let’s learn how to teach our young players the basics of how to slide and how to do it safely.
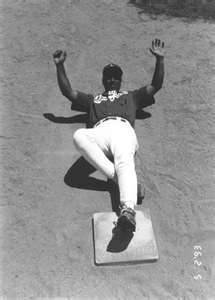
Ending Position Of Basic Leg First Slide
Baseball Coaching
Beginning: As they say, “Let’s begin at the beginning,” and that means no action, just a teaching walk through.
(1.) Everybody, whether they realize it or not, have a dominate side to their bodies, which is normally the right side for a right handed person, left for the lefty, but this is not always the case, and it’s important we’re comfortable when sliding, and that’s normally with the dominate portion.
(a.) In order to figure this out, simply have your Player(s) sit Indian style, as 99% of the time their dominate leg will be placed on top. That means the top leg (dominate) will be the leg they’ll most likely naturally extend forward when sliding. This doesn’t mean this is a rule this must be followed, because it’s not, but it’s a very good place to start when teaching basic sliding.
(b.) When teaching basic sliding, the player(s) should always remove their shoes. Although the players are not yet physically running or sliding, therefore no chance of injury, you must convey the importance of learning not to accidentally stick their cleats into the dirt, risking at best, a slide too short resulting in being out, worse risking an ankle injury. By having an unobstructed view of the foot positioning, they have a better understanding of what is expected from them.
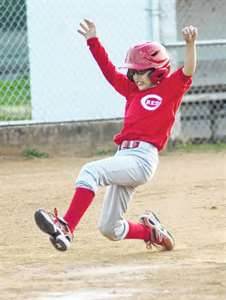
Good Form
Baseball Coaching
(c.) Teach them to always point their toes upward, trying to hold their entire foot off the ground, which will keep their cleats from contacting the ground and risk hanging up.
(d.) The extended leg should be slightly bent, as you do not want to slide into a base with a locked knee, which could result in a serious injury. The bent leg will absorb the shock of colliding with the base as well as help keep the foot off the ground. For coaches whose leagues use “break away” bases and may not consider teaching the bent leg as imperative, forget those types of bases exist. Teach sliding the proper way the first time.
(e.) The next body part which is subject to injury are the hands and wrists, as young players have a tendency to want to cushion their fall with their hands. It’s important players are taught to raise their hands into the air as they begin their slide, either overhead or out to the side. It’s accepted practice for the runner to hold a batting glove in each hand in order to prevent injury, but this mainly applies to protecting the fingers when making contact with the base on a head first slide, not a straight in slide … hands up.
Here’s a tip to use to get players accustomed to holding their hands up off the ground.
(1.) Use plastic cups, better have a lot because they won’t last long.
(2.) Fill each cup @ 1/3 of the way full with water.
(3.) Have the player hold a cup in each hand while sliding, with the intent of not spilling the water out of the cup. The only way to try and do this is to keep the cup level, which requires keeping the hands to be up.
Sometimes you have to be a little bit sneaky when teaching kids.
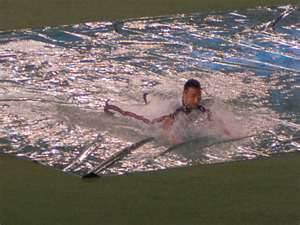
Too Much Fun?
Baseball Coaching
Sliding: Now is the time to put what you have taught the players into use by practicing the actual mechanics of performing the slide, and that can be as varied as the coach. I’ve seen coaches water the grass outfield where they intend to slide, in order to make it slippery, I’ve seen the actual use of a Slip & Slide water devise and weather temperatures permitting getting wet, these are fun ways to practice and that’s always important.
But, I prefer to practice what and when I decide without being at the mercy of Mother Nature. I have found taping 2 Large cardboard boxes, broken or cut down flat, provides a good sliding surface, but you’ll need 2 or more to provide an adequate sized sliding area, depending on the sizes of the boxes.
Drill:
(1.) Lay the cardboard onto a flat surface.
(2.) Place an orange cone(s) 3’ to 5’ in front of the cardboard as the indicator of when the player should begin their slide.
(3.) You’ll need to stand on the cardboard, ideally a coach on each front corner, in order to keep the cardboard stationary and not slide with the player.
(4.) Watch each player perform their slide, correcting as you go along with the drill.
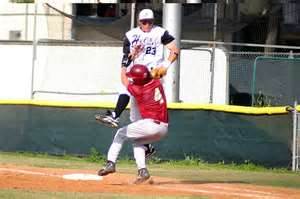
Safe Had He Slid
Baseball Coaching
Swing Not Quite Right? Check This Out!
Click Here!Slide or Not Tip? Most coaches will tell their players to Never slide into first base, and with good reason, as the fastest way to get to first base is by “Running Through It” which keeps your momentum always going forward and moving as fast as you can.
But…. As with all other things in baseball, there is an exception. While running to first base you realize the ball will most likely beat you to the bag, make a mental note of the first baseman’s feet positions. If you see his feet move up and off the ground, he’s leaping to catch an errant high throw from his fielder. Once he catches the ball he’ll use a swipe tag as he comes down to tag you on the shoulder or back as you pass by him, for the out. In order to avoid this tag, slide head first over the base, which takes the tag away from him because he can’t reach low enough to touch you before you’re safe at first.
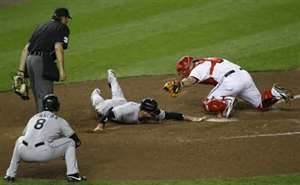
Sliding Past Well Protected Plate
Baseball Coaching
Here’s another Tip: Close plays at the plate are always exciting, but as a runner we are aren’t concerned about excitement, only scoring safely, but how do we give ourselves any advantage of accomplishing that.
(1.) Most leagues implement what is known as the “Slide Rule” which requires a runner to slide into home plate on any close play, therefore bowling the catcher over is not an option, as that results in an automatic out.
(2.) A good catcher will block the plate with his leg and we don’t really want to slide into those hard plastic shin guards as they probably won’t move.

Hands Up
Baseball Coaching
So what do you do?
You must slide past the plate and touch it with your hand.
(1.) Unlike a normal slide which you will begin 3’ to 5’ feet in front of the plate, you do not begin your slide until you are literally even with the plate, and as you slide by the plate, extend your arm sliding over the plate. Don’t worry about making actually contact with the plate as that could result in injury, no umpire will call you out for not touching the plate, if they could even tell, as long as the hand goes over the plate reasonably low, as it can’t be sticking straight into the sky either.
Baseball Coaching to Running the Bases

New! Comments
Have your say about what you just read! Leave me a comment in the box below.