Portable Pitching Mound / Construction:
Portable Pitching Mound - In most cities and towns baseball fields with pitching mounds are a scarce commodity, as mounds are expensive and at times difficult to maintain, and additionally there are more youth aged teams which do not require a mound than those who do, thus more fields without mounds.
Therefore, the ability to always acquire a practice field with a mound is questionable at best, which makes training your pitchers to throw from a pitching mound extremely difficult, if not impossible. This is not a good scenario as with any baseball skill, real game conditions are not the time to try new things.
One solution to this problem is to use a portable pitching mound, constructed of materials other than dirt, which can be somewhat stationary or completely portable by un-assembling, then re-assembling on site, which ever you choose.
There are numerous companies which sell various types of portable pitching mounds, most of high quality material and workmanship, and unfortunately,Quite Expensive, ranging from $800 to $4500.

Maybe I should say “In my opinion… expensive” as in this economy I see this as quite a bit of money. I’m not saying the products are not worth the cost, but how would you like to build a portable mound, which will more than serve the purpose, for @ $125.00?
Let’s go through the steps of constructing a portable pitching mound of our own with lumber, plywood and some astro turf, all within a few hours. Bear in mind, this is but one example. You can alter this design or totally create your own design, but this will give you a Benchmark from which to begin.
List Of Building Materials: All Lumber Should Be Treated For Outdoor Use:
*** 3 - 2” x 10” x 8’
*** 1 - 2” x 10” x 12’
*** 1 - 2” x 4” x 8’
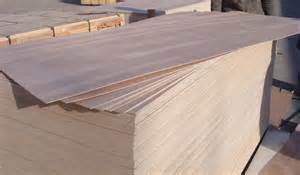
*** 1 sheet of 4’ x 8’ x ¾” exterior plywood. Note: The ¾” plywood will give you a much stronger platform with No give, but it is also extremely heavy. Consider both when deciding what you want to use.
*** 1 - Roll of AstroTurf 4’ wide
*** 2 quarts of contact cement or 3M Strength Spray Glue. I prefer to use the 3M spray as it’s easier to work with. I’m a bit sloppy.
*** 1 box (200) 1 ½ Deck Screws
*** 1 box (50) 3” Deck Screws </B>
Beginning Construction: Measure Twice…Cut Once.
1. Cut 4’ off the 2” x 10” x 12’ board, as it will be used as the back support of the mound.
2. The Portable Pitching Mound requires a 1” slope for every 1’ of mound, so we need to lay this out on our 2” x 10” x 8’ boards, one at a time.
Make a mark at 24”, then make a mark at 3’, 4’, 5’, 6’, 7’ and 8’. Be sure to use a square to insure the quality of the marking dimensions.
3. Beginning at the 3’ mark, measure down 1” and make a mark. Proceed to the 4’ mark and measure 2” down, 5’ - 3” down and so on until the last mark, at the 8’ mark, is 6” down the board.
4. Using a Chalk Box, snap a line from the 3’ mark (1” down) to the 8’ mark (6” down) creating the angle to be cut, with a power saw. After finishing the angle cut, cut a 3” piece off from the narrow bottom end. This 3” length will be replaced when the two braces, back and front, are nailed in place.
5. Either repeat the steps on each one of the remaining 2” x 10” x 8’ or use the first finished board as a template. I’d recommend using the template method in order to reduce the chance of making a cutting or measuring error.
Reviewing: At this stage you should have 4 - 2” x 10” x 8’ boards cut with identical angles and a 4’ - 2” x 10” piece, which was cut off the 12’ 2” x 10” x 12’ piece.

Beginning Assembly:
1. Lay the four angled boards on a flat surface. Place the 4’ brace section against the wide ends of the 4 boards, space evenly apart and secure with screws.
2. Cut a 4’ piece of 2” x 4” to use as a brace, place against the narrowed end of the boards, space evenly and secure with screws.
3. Using the remaining 2” x 4”s, cut and install braces in between the 2” x 10”s at the 2’ mark where the angle begins. This will allow greater support and additional nailing space for installing a pitching rubber.
***The project is totally framed and secure allowing for movement should you desire.***
Installing The Plywood:
1. Measure and cut a piece of plywood to cover the flat portion of the platform. This should measure 4’ x 25 ½” wide. Secure with screws.
2. Use the remaining portion of plywood to cover the angled portion. This can be a little tricky, but if you can cut a 5 degree angle cut on the end piece of plywood which butts against the flat part, you’ll get a better and smoother fit. *** Secure the plywood with screws every 4” apart.***
Installing The Astroturf:Portable Pitching Mound
1. You can either pre-cut the Astroturf to fit the mound before gluing it down, or glue the turf to the plywood, then trim with scissors. I recommend installing then trimming, as the method is more forgiving of mistakes.
2.Method One: Spray the entire plywood platform with 3M Hi Strength spray glue and the backing of the Astroturf, then install.
Method Two: Using contact cement, paint the entire plywood surface, then the backing of the Astroturf, then install.
3. Follow the manufacturer’s recommendations on the length of time to allow the glue to set up.
4. To install a pitching rubber on the flat portion of the platform, cut a 1” x 4” scrap piece of wood 18” long, paint white, center and secure with screws.
In one afternoon and for @ $125, you have constructed a portable pitching mound which will last for years and enhance the training ability of your pitching staff many fold.
Portable Pitching Mound Back to Baseball Training Aids

New! Comments
Have your say about what you just read! Leave me a comment in the box below.