How to Build a Batting Cage
I’m going to teach you, beginning with the stationary, how to build a batting cage, which is not exactly child’s play, but not as hard as one may think. As long as you have basic construction tools and normal manual dexterity you won’t have any difficulty.
(1.) Pre-fabricated factory manufactured batting cages are readily available in just about any configuration you may want and are usually easily assembled, but they are also accompanied with a hefty price tag. Depending on quality, size and materials these batting cages can range from a few thousand to over 20 thousand dollars and more.

I’ll assume you wouldn’t be reading this if you were willing and able to spend that sort of money on the cage, so I’ll proceed with the assumption our goal is to build the best quality batting cage at the lowest possible cost. Remember the costs of home made cages will also fluctuate dramatically depending on the size of the cage and the quality of materials used, so proper planning and material pricing is of key importance.
How to Build a Batting Cage
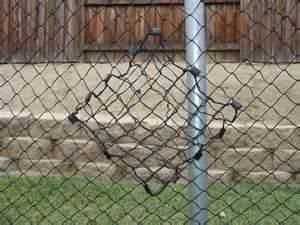
Nothing Wrong With Patches
Therefore, your first decision should be “How long will I use this cage?” If your team, or child is 14 years old, material with a life expectancy of 3 to 4 years will more than suffice. However, a team or child 9 years old will require much better quality materials if it’s planned to be use through high school play.
(2.) The second decision which must be made is the size batting cage you‘re going to build..
Steps To Building A Back Yard Batting Cage:
Step 1 Location: Where you will locate the batting cage will be your first step and there are various factors which affect this decision.
(a.) How long and wide is your yard? A yard 60 feet wide obviously can’t accommodate a 70 foot batting cage. The size of the batting cage may have to be adapted to the allowable yard size, and the smaller size may not suit the intended purpose, which squashes the project before it starts, but also before materials are bought.
How to Build a Batting Cage
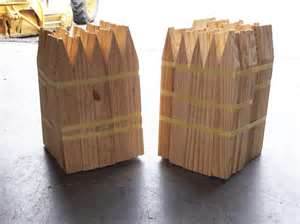
Never Too Many Wooden Stakes
(b.) What is the terrain? Does the yard lay flat, a gentle slope, rolling or is it a hill? Regardless of how the ground lays the cage may be adaptable with a few modifications. For instance you may have to forego an area intended for a pitching machine because it’s too hilly yet can still be used as hitting area.
(c.) Any type of turf, or lack of turf is fine, only wet or swampy ground is unplayable, but it will require Policing the area. All rocks, debris, tree stumps, anything which could cause an injury to a player or damage to the equipment must be removed.
(d.) Now’s the time for personal choices to be implemented and planned for, such as … Do you want to mow grass inside the cage or try to strip the sod; Deal with mud from rain or plant grass, etc.
Step 2: Size: You have determined who will use the batting cage, 20-40 feet long for kids, 70-80 feet for adults, 12 feet high and 12 feet wide, now you have 2 choices of how to buy netting.
(a.) General sized netting large enough to accommodate the cage, but bear in mind this could be difficult to cut to size without destroying wrapping which prevents unraveling;
(b.) Purchase a professionally made net which meets the size of the cage.
I’d check on line for ready made netting as I believe you’ll find the extra cost would most likely be worth it. Don’t forget used netting is available and if it has been gently used is the way to go cost wise. In any event, before getting too ambitious, keep in mind the bigger the cage - the bigger the cost.
How to Build a Batting Cage
Cedar Lumber 2X4
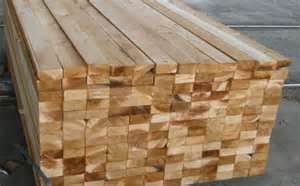
Step 3: Frame Material. The next decision is what type of material are you going to use to construct the frame work of the batting cage. There is a lot to consider in this segment concerning costs, difficulty of assembly, weight and/or durability. Let’s look at the Pros and Cons of a few examples of common building materials.
Lumber: Treated or Cedar lumber, untreated pine lumber will quickly rot, can be used to build the frame.
How to Build a Batting Cage
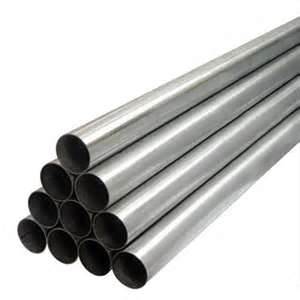
Metal Pipes
Pros:
a. Wood is easy to work with;
b. No specialized tools. Most equipment and tools required to use wood are normal everyday tools, hammer, saw etc. which would not be an extra expense;
c. Wood is sturdy;
d. Easily disposable afterwards.
Cons:
a. Treated lumber has a tendency to warp and twist;
b. Cedar lumber is expensive;
c. Weight and Transportation becomes a large issue with lumber as some 4x4 posts will be 12’-16’ long.
Aluminum Poles: Black Iron pipe has all the benefits of aluminum, but is more expensive.
Pros:
a. Light weight;
b. Maintenance free;
c. Sturdy
Cons:
a. Could be difficult to work with;
b. Could require specialized tools.
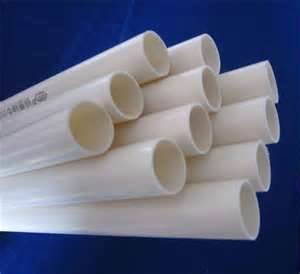
2" PVC Pipes
How to Build a Batting Cage
PVC Pipe: PVC pipe comes in different thicknesses which determines strength, always use schedule 40 pipe.
Pros:
a. Easy to work with;
b. Light Weight;
c. Easy to configure.
Cons:
a. Must be glued together to retain structural stability.
Layout: Getting the area and frame outline properly sized is important.
1. Lay out the area where the cage is to located;
2. Drive a stake into the ground at one end of the proposed site, Using a tape measure the length of the cage (we’ll use 80’) and drive another stake in the ground.
3. To mark the width, measure 12’ across from each stake and drive in stakes. This will give you the Four (4) corners of the batting cage.
You’re not building a house so the framework doesn’t have to be perfect, but you do want it as square as possible. In order to do this we’ll use a 3-4-5 method.
1. Pick one corner stake, measure 3’ out from it in one direction and drive a stake.
2. From the same corner stake, measure 4’ out from it in the opposite direct from the first.
3. Measure across from 1 new stake to the other, forming a triangle, it should measure 5’. If it’s 5’ 3” or whatever, that’s plenty close enough unless you want it perfect. If it’s not even close, say 3’ you’ll have to adjust the stakes or your batting cage may look worse than the house Jack built.
4. Now that your outline is square, tie string low around each corner stake forming a rectangle.
One Type Of Construction
How to Build a Batting Cage
a. I always used some cheap white spray paint and traced along the string to establish my outline because I could then remove the string and stop tripping over it, but you can leave the string in place.
5. I suggest placing framework every 20’ apart, you can place them closer or farther apart, but be careful not to space them too far apart or the netting will not hang right.
6. From the corner stake of one end and on each side, measure in 20’ increments marking the spot with spray paint or a stake, to the other end. In our 80’ example we’d have to dig 5 holes on each side, 10 total, the corners and 3 in between on each side.
You now have your cage support structures perfectly measured and identified and are ready for the next step.
How to Build a Batting Cage
Plumbing Leg
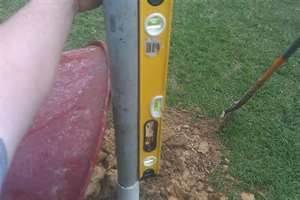
Preparing to Secure Cage Frame: The legs of the frame must be secured in order to keep it from moving and there are several different methods in which to accomplish this and is purely an individual decision.
1. Using a post hole digger, and depending on the terrain, dig all holes 12” to 18” deep. Deeper if possible, but when digging in very rocky soil the 12” deep can become a real challenge. After digging all the holes do a visual sighting, then re-measure the distances to insure you haven’t strayed from your layout.

PVC Cutting Tool
How to Build a Batting Cage
Frame Construction: You are now ready to begin constructing the frame work. In our example we’ll use 2” schedule 40 PVC pipe, but the other materials will follow the same essential steps. You may want to consider using 3” PVC pipe if you’re in an area prone to high winds, but although becoming much sturdier, the frame will also be much heavier and more expensive.
Material List:
1. 24 - 2” x 10’ schedule 40 pipe
2. 6 - 2” 4 way fittings
3. 4 - 3 way fittings
4. 15 - 2” couplers
5. Glue & Solvent
6. Concrete
Equipment List:
1. Post hole digger
2. Level
3. Shovel
4. PVC Cutter
5. Tape Measure
6. Pencil
Begin by Taking your PVC cutter cut 5-4’ sections of pipe;
Cut 5-2’ sections of pipe;
Lay out and complete 1 section, then you’ll simply repeat the steps for each section. The only difference is the two end sections will use 3 way fittings instead of four way fittings.
How to Build a Batting Cage
4 Way Fittings
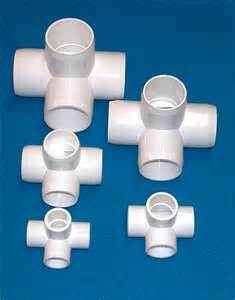
1. Take 1-10’ piece and 1-4’ piece and glue them together with a 2” coupler. This will give you a 14’ leg and after inserting 2’ into the ground, will leave you a 12’ high ceiling. Repeat this step, which will be the 2 legs of the frame.
2. Take 1-10’ piece and a 2’ piece of pipe and glue them together with a coupler, giving you your 12’ span or width piece.
3. Since the first section will be an end section, glue a 3 way fitting on the top of each leg, one opening onto the leg, one opening pointing to the leg directly across, the 3rd opening pointing towards the next leg.
4. Take the remaining 12’ foot piece and glue each end into the 3 way openings which face it. You now have a finished end section of the batting cage. Repeat this exact procedure, which will give you the opposite finished end of the cage.
5. Repeat this same procedure for the remaining 3 inner sections, except instead of gluing a 3 way fitting you’ll glue a 4 way fitting on top of each leg.
6. The last step in fabrication is to glue 10’ pieces of pipe to the 3 & 4 way fittings on top of the legs, tying the entire frame work together. To be on the safe side I would loose assemble this part of the process before gluing together and stand the cage piece(s) in the existing holes to be sure no modification is required. Once proper size is verified, glue pieces together.
How to Build a Batting Cage
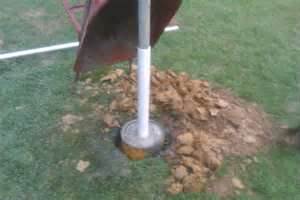
Installing A Sleeve
Setting the Base: Your frame is finished but you must decide on how to anchor it, and there are several methods to accomplish this.
1. After setting the legs in their proper holes you can simply replace the dirt you removed, using a 2x4 and hitting it with a hammer to compact the dirt as you refill the hole.
2. After plumbing and leveling each leg and securing it with stakes, fill the holes with pre-mix concrete and allow it to cure for 24 hours before removing the stake supports.
3. If you prefer to use a sleeve in which to insert the legs into, cut pieces of pipe 1 size larger than the frame, in this case 3” pipe, place into the hole and pour concrete around the outside perimeter of the pipe.
How to Build a Batting Cage
Not Too Much
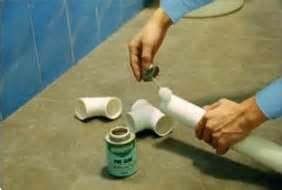
How to Glue: The steps for gluing PVC are quite simple and the solvent and glue come with a brush or mop attached for easy application.
1. Take the solvent and apply to the end of the pipe @ 2” - 3” up from the end;
2. Then apply the solvent to the inside of the fitting; The solvent cleans the pipe and prepares it for the glue to be applied.
3. Repeat steps 1 and 2 with the glue;
4. Slide the fitting onto the pipe, slightly twist and hold for a couple of seconds. The glue sets quickly.
Be sure to apply the solvent and glue thoroughly on the areas to be glued together, but you don’t have to glob it on. Use a rag to wipe off excess glue around the joint, but once the solvent stains the pipe, it’s permanently stained.
How to Build a Batting Cage
Net Hanger

Securing the Netting: How to secure the netting is totally dependent on what type of netting, form fitted or loosely wrapped.
1. You can install eye bolts by simply drilling holes in the PVC;
2. You can use electrical tie straps;
3. Wire;
How to Build a Batting Cage
Tent Stakes

4. Velcro straps
Depending on how tight you want to secure the bottom of the netting use:
1. Landscaping fabric pins;
2. Tent pegs;
3. Cinder blocks; etc.
Finishing Touches: There are many additional features you can incorporate into your batting cage which will make it look professional and turn it into a multi-purpose facility.
1. Set Home plate in concrete and use spray paint to draw a permanent batters box;
2. Install a pitching machine;
3. Install padded cushions to the batter box end of the cage;
4. Use a portable pitching mound;
5. Install lights.
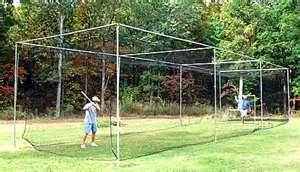
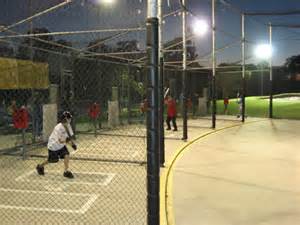
How to Build a Batting Cage
Finished Product
How to Build a Batting Cage to Home Page

New! Comments
Have your say about what you just read! Leave me a comment in the box below.